
Welcome — this article explains how to tune your mandolin for a stable, reliable sound.
Standard tuning uses pairs: G G · D D · A A · E E, from low to high. These are the same notes as a violin, making comparison easier when you hold the instrument correctly.
To save time, use an electronic tuner or an app. Gently stretch new strings to help them settle faster.
Finishing each adjustment by increasing string tension helps the mandolin stay in tune when you play with others.
By following these simple steps, you can tune your mandolin quickly and spend more time learning and practicing your instrument.
Understanding 8-string mandolin tuning
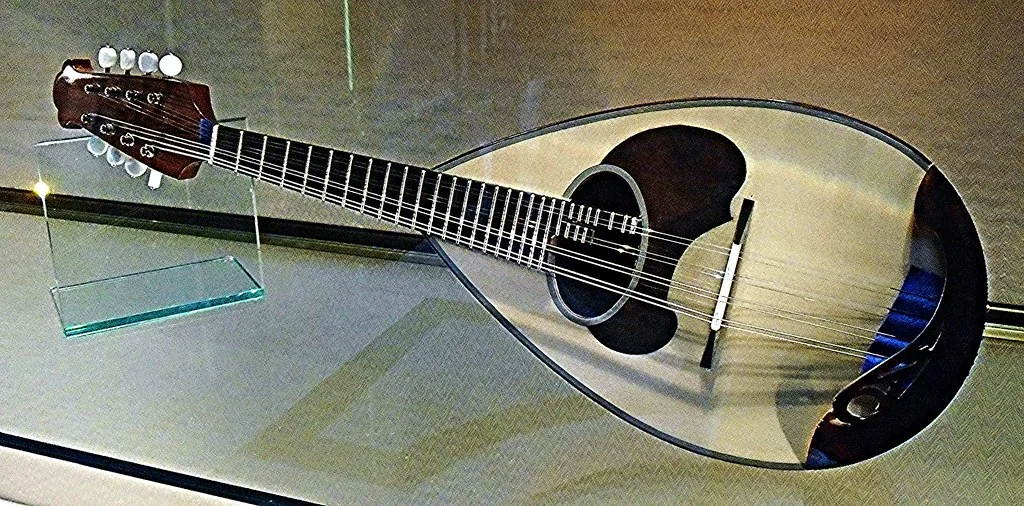
The mandolin has four pairs of strings tuned in unison, which define its range.
Standard tuning is G G · D D · A A · E E, from low to high. These open-string notes are the same as a violin’s, making it easier to transcribe music and compare sounds between the instruments.
Each pair has two strings tuned in unison. Tune them precisely to avoid beats when one string is slightly out of tune.
At the headstock, note the direction of the tuning pegs: those for G and D point upward, while those for A and E point downward when the instrument is held correctly. The E pair is closest to the floor.
The short neck and high string tension can take some getting used to. Accurate left-hand placement and tuning each pair improve stability and sound projection.
| Pair | Open-string note | Tuning peg direction | Position |
|---|---|---|---|
| Pair 1 | G | Upward | Lowest |
| Pair 2 | D | Upward | Second-lowest |
| Pair 3 | A | Downward | Third |
| Pair 4 | E | Downward | Highest |
Learning these simple reference points speeds up tuning and helps you avoid selecting the wrong strings or mixing up the pairs.
8-String Mandolin Tuning: Complete Guide
The most reliable method is to isolate one string in each pair before making fine adjustments.
Follow this order: start with G, continue with D and A, then finish with E. Work on one string at a time so the tuner gives you a clear reading.
Practical steps:
- Pluck both strings in a pair, then mute one to isolate the other.
- Turn the tuning peg gently to approach the note. Always finish by increasing the tension so the tuning holds better.
- Make one quick pass through all the pairs, let the strings rest, then make two more passes to fine-tune them.
After fitting new strings, stretch them gently and retune, finishing each adjustment by increasing the tension.
| Step | Action | Purpose |
|---|---|---|
| 1 | Isolate one string | Give the tuner a clear signal |
| 2 | Tune approximately | Stabilize the tension |
| 3 | Rest and stretch | Reduce tuning drift |
| 4 | Make fine adjustments | Eliminate beats |
Practicing this method will save you time and develop your ear, even when you are just learning to tune.
Tools and tuners for accurate tuning
Choosing the right tool makes tuning much faster and reduces mistakes in rehearsals and the studio.

Chromatic electronic tuners: these give quick, accurate readings. Clip-on models detect vibrations and remain reliable in noisy surroundings. On stage, you can use a clip-on tuner alongside another electronic tuner for a second visual check.
Apps and online tuners: allow microphone access, pluck a string until the reading settles, then adjust it until the indicator is centered. Start with the G string (G3) to follow the pairs in order.
If the tool detects nothing, check the USB cable on an external microphone, its on/off switch, and whether it has been muted in software. Try Chrome or Firefox if Safari causes problems.
Set the device to “mandolin” or “violin” mode if available, and work in a quiet space to avoid background noise. For professional sessions, some higher-quality, more expensive tuners offer stable readings that save time when tuning your instrument.
“A suitable tuner reduces adjustments and lets you focus on playing.”
To learn more, read about tuning and the theory behind these practical tools.
Ways to tune without a tuner
Practicing without a tuner develops your ear and your confidence on the fretboard.
Tuning with intervals on the fretboard
Use simple intervals to match pitches. Fret an A string at the seventh fret: it should produce an E that you can compare with the open E pair.
Repeat the method for the other strings, using consistent fretboard reference points. This helps stabilize the overall tuning before you make fine adjustments.
Using harmonics at the twelfth fret
The harmonic at the 12th fret should ring clearly on each string in a pair.
If you hear beats, adjust the tension until they disappear. This method reveals small differences between the strings.
Matching another instrument
Use a piano, guitar, or violin as a reference. Aim for A at 440 Hz (or 442 Hz) if you need to play together.
Practical tip: compare several notes and take time to cross-check them. Training your ear makes you less dependent on tools and improves the quality of your tuning.
| Technique | Reference point | Benefit |
|---|---|---|
| Fretboard intervals | A at the seventh fret = E | Fast and accurate for pairs |
| Harmonics at the 12th fret | Clear harmonics | Detects small differences |
| Another instrument | Piano, guitar, or violin | Keeps instruments in tune for group playing |
Listen for beats: the faster they are, the greater the pitch difference between two strings that should be in unison.
Troubleshooting difficult tuning
When the tuning seems unstable, a few simple steps are often enough to restore accurate pitch.
Note too low or too high: if a note is too low, tighten the tuning peg gradually until you reach the target pitch, finishing by increasing the tension to stabilize the tuning. If the note is too high, loosen the string slightly until it falls below the target, then bring it back up gradually to prevent drift.
The microphone does not pick up the sound well:
check that it is on, unmuted, and connected to the correct port. Check the USB connection if necessary.
Try another browser, such as Chrome or Firefox, if detection remains unreliable. Reduce background noise and move the microphone closer to the sound hole for a clearer reading if you are not using a clip-on tuner.
New strings and tuning stability:
gently stretch the strings several times, tune them, then let them rest for 10 to 15 minutes before repeating the process. Make several quick passes to stabilize the tension.
Eliminating beats within a pair:
- Tune each string separately, then play them together.
- No beats means they are in unison; a wavering sound reveals a difference you need to correct.
- When playing with other instruments, quickly check the tuning of the A and E pairs.
“Always finish adjustments by increasing the tension to help the tuning hold over time.”
String care and habits that improve stability
String life depends mainly on how often you play and how you care for the strings each day.
When and why to change your strings
Change the strings as soon as the tuning becomes unstable, their brightness fades, or oxidation appears. If you play every day, plan to replace them every 1 to 2 months.
Worn strings strain your ear and increase the time spent correcting pitch, slowing your progress.
Stretching technique and gradual tuning
After fitting new strings, stretch them gently above the instrument’s body, then tune them in several passes. Let them rest between passes to stabilize the tension.
Wipe the strings after every session to remove sweat and dust. Store the instrument in a case to limit changes in humidity.

| Action | Frequency | Purpose |
|---|---|---|
| Replacement | Every 1 to 2 months (if you play every day) | Keep the tuning stable |
| Stretching and repeated tuning passes | Whenever you fit new strings | Stabilize the tension |
| Wiping and storage | After every session | Extend string life |
Regular care reduces the time spent tuning and makes the instrument more enjoyable to pick up.
Alternative tunings and musical styles
Exploring other tunings often reveals simpler chord shapes and fresh resonances.

Modal G: G D G D
Modal G lends itself to drones and modal melodies.
It is ideal for traditional music and old-world atmospheres.
Open G: G D G B
Open G allows easy chord shapes.
Its resonances resemble those of some guitar tunings.
Irish tuning: G D A D
This tuning makes quick ornaments and Celtic playing easier.
The intervals change, so adapt your fingerings before playing with a group.
Practical tips: check the string tension for your type of mandolin and chosen string gauge. Test each new tuning on your own before using it with a group. Return to standard G D A E tuning to regain your familiar reference points.
| Tuning | Use | Benefit | Effect on the instrument |
|---|---|---|---|
| Modal G | Traditional and atmospheric music | Drones and modal melodies | Tension similar to standard tuning |
| Open G | Folk and bluegrass | Open chords and resonance | May increase body vibration |
| Irish | Celtic repertoire | Ornaments and ease of movement | Changes fretboard reference points |
“Alternate tunings inspired by the fiddle have been around for years and broaden the range of expression.”
Conclusion
To finish, build a simple routine: tune in pairs, finish by increasing the tension, and make several quick passes to stabilize the pitch.
Keep a reliable tuner handy and train your ear so you can manage without one when you are away from home. Remember to stretch new strings, clean them, and replace them regularly.
If you run into a technical problem, check the microphone, switch browsers, or turn off USB muting to save time. Explore alternative tunings for different styles, then return to standard tuning to regain your reference points.
This article aims to make playing less stressful and help you enjoy your practice sessions on stringed instruments. To go further, learning to play remains the key to steady progress over the years.